A few months after Aidan was born, my wife came to me and said she wanted backyard chickens. I knew the day was coming, but I honestly didn’t expect it so soon after our son’s birth.
I made it clear from the get-go that I was fine with her having chickens, but that I wasn’t interested in taking on the responsibility of caring for chickens at this time in my life (I was pre-occupied with learning how to take care of a newborn!). I encouraged her to do the research on caring for and maintaining urban chickens, and if she was willing to take that on by herself, I would be happy to build her a coop.
She attended a free seminar at Garden Sphere, and did a bunch of research, and decided she was okay with being the primary caretaker of a flock of hens. And she decided she would be picking up the chicks towards the end of March (about 5-6 weeks later).
I knew the chickens wouldn’t be moving outside permanently until they were about 8 weeks old, but I wanted to have the coop and run done as early as possible (I don’t like leaving things for the last-minute).
Michelle picked up some books from the library, but my favorite was Reinventing the Chicken Coop: 14 Original Designs with Step-by-Step Building Instructions by Kevin McElroy and Matthew Wolpe. I used their instructions for “Two Simple Classics: The Standard” as the base idea for the coop, then took off on my own from there.
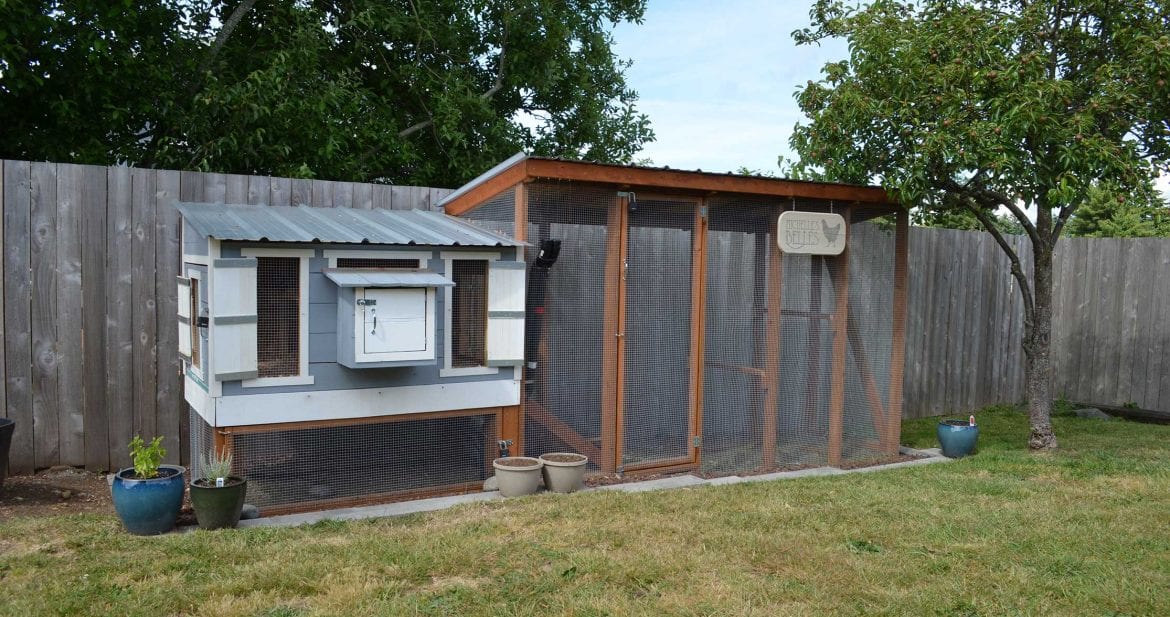
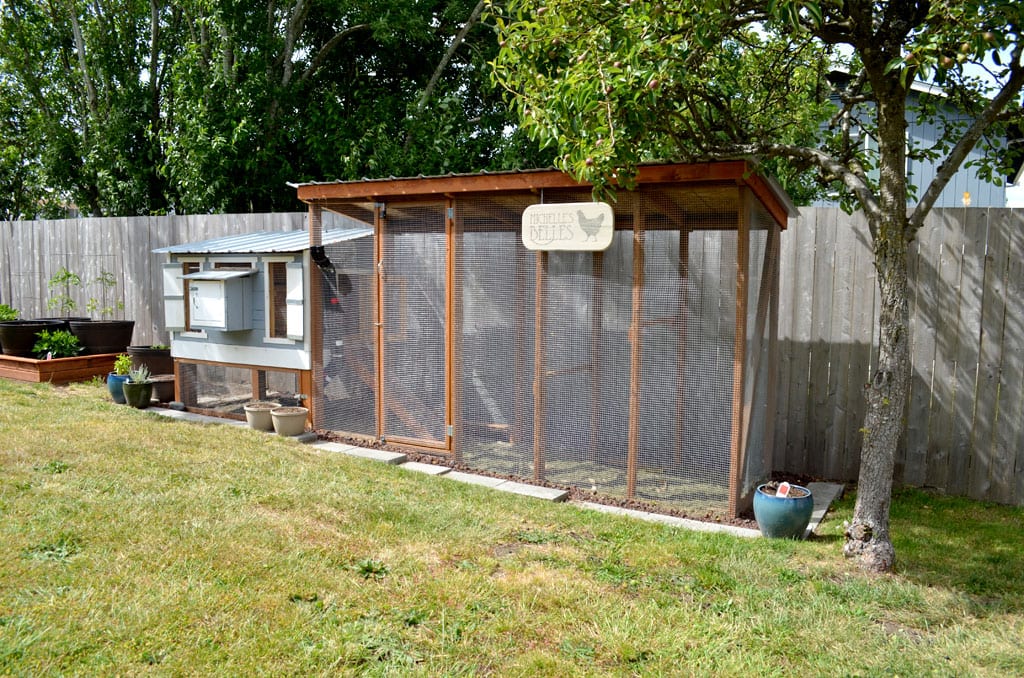
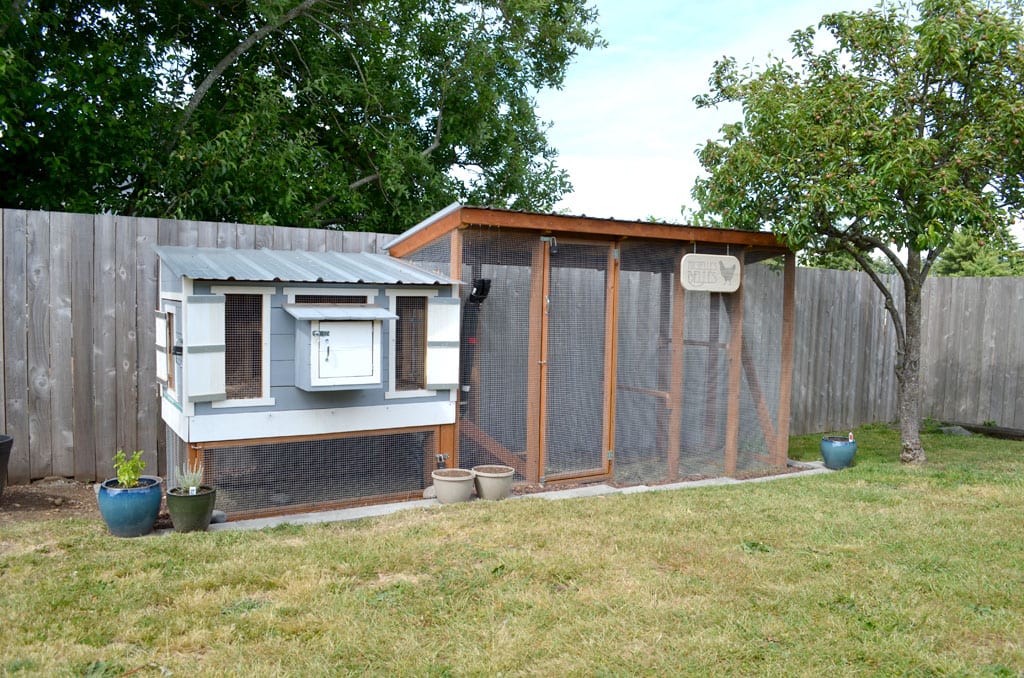
The end result is an approximately 60 square foot enclosure for 5 hens. The elevated coop is 3’x5′, with an attached run of 3’x10′.
Building The Coop
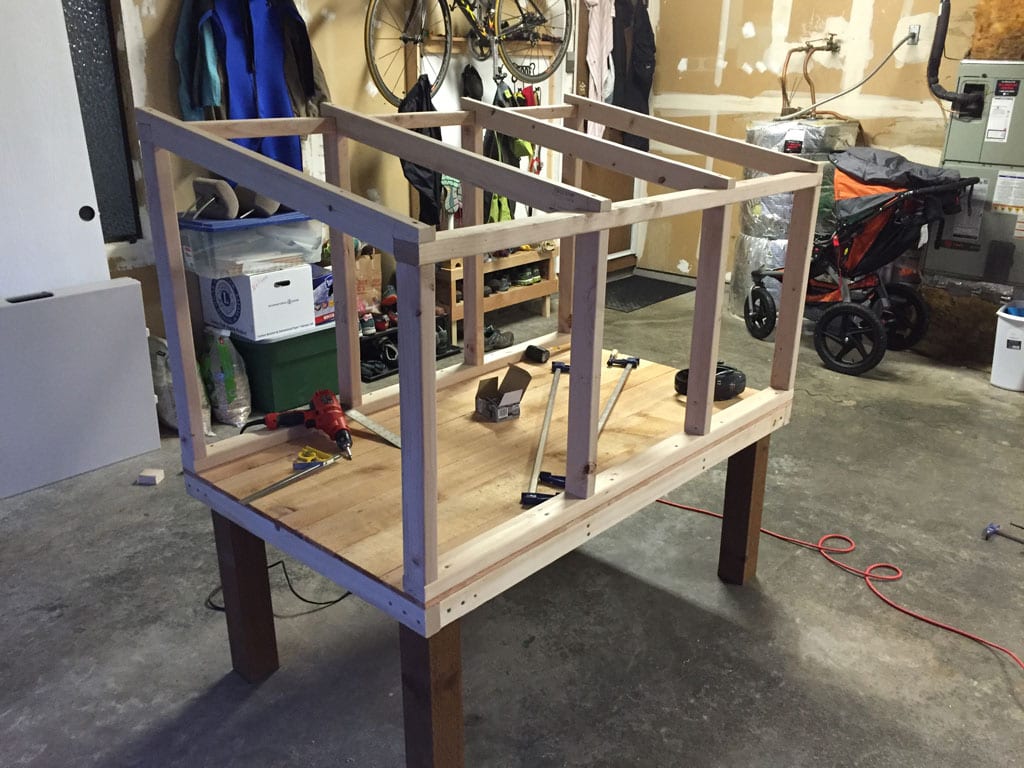
As I mentioned, I based the coop loosely on The Standard design from Kevin and Matthew’s book. I had decided to skin the outside of the coop in cedar fence pickets because 1) they will stand up to the elements, and 2) they are inexpensive at about $1.74 for a 5.5″x5′ board. As a result, I made the base of the coop 3’x5′ to help minimize waste between the 8′ dimensional lumber and the 5′ cedar boards.
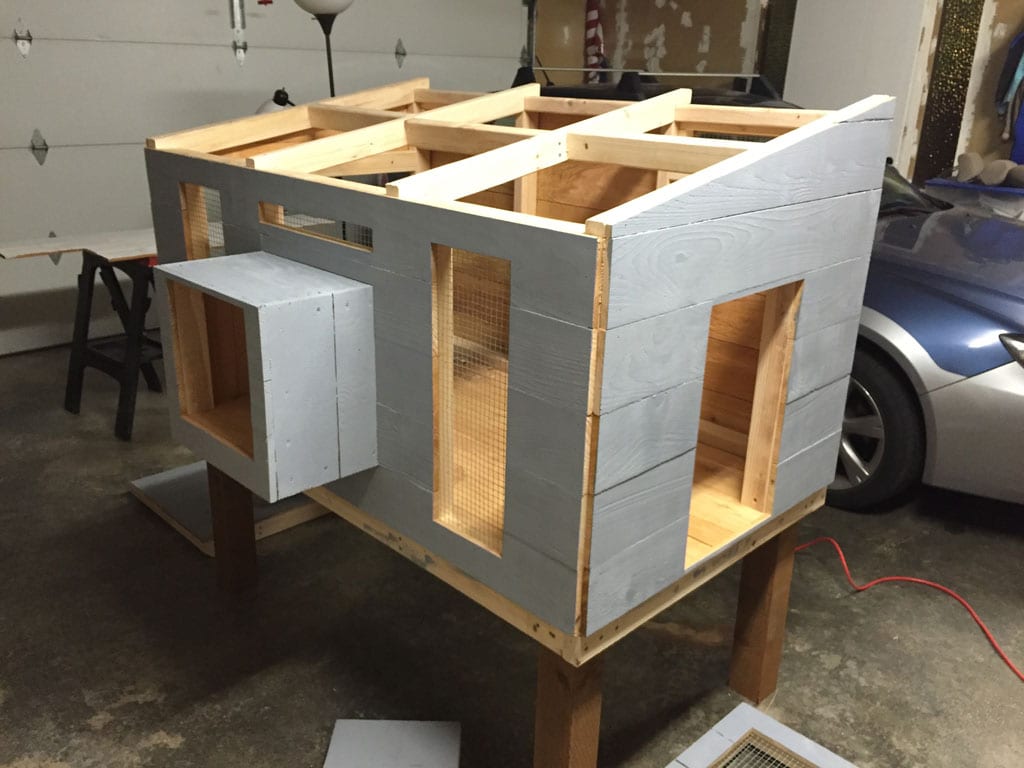
The coop itself is standing on four, 2′ high 4×4 posts, with the floor on top of that.
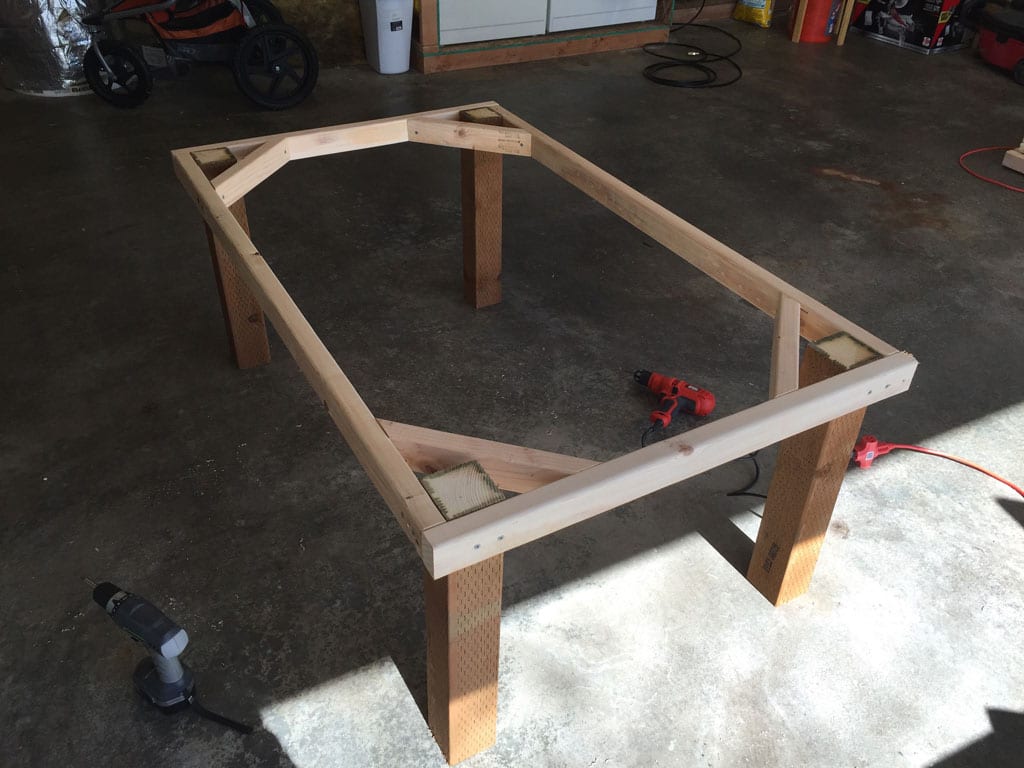
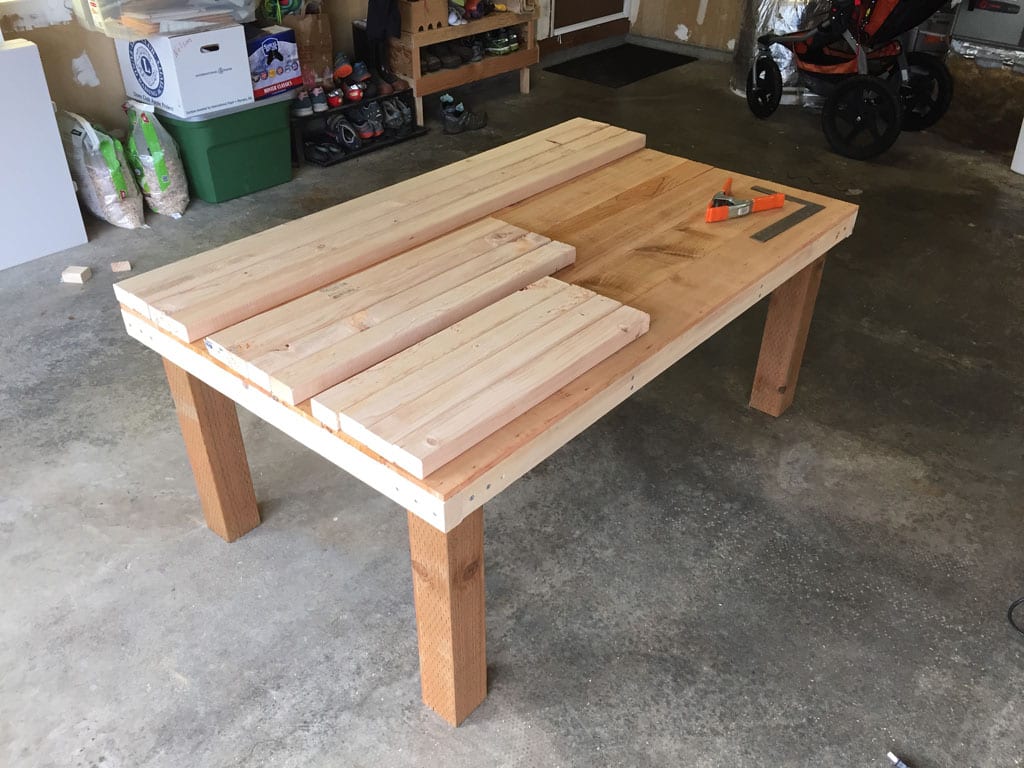
The frame of the coop is built from 2×3 studs. I opted to go this route instead of 2x4s because they are both cheaper and lighter, and this is just a chicken coop and not a residential dwelling. 2x4s would have been overkill.
The walls of the coop are built according to Kevin and Matt’s plans, at 24″ for the front wall and 30″ for the rear wall.
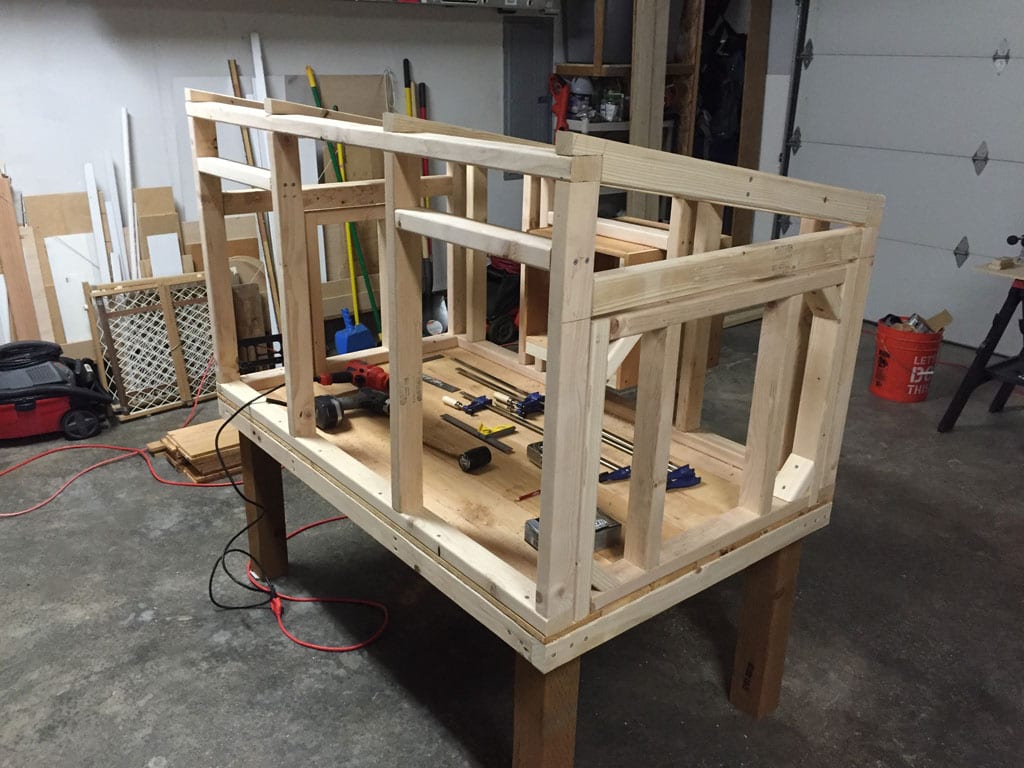
After I built the walls, I started the framing for the windows, doors and nesting box. Originally, I had the front of the nesting box pretty much flush with the exterior wall, but it took up way too much space inside the coop. So I shifted it and made it sit primarily outside of the coop.
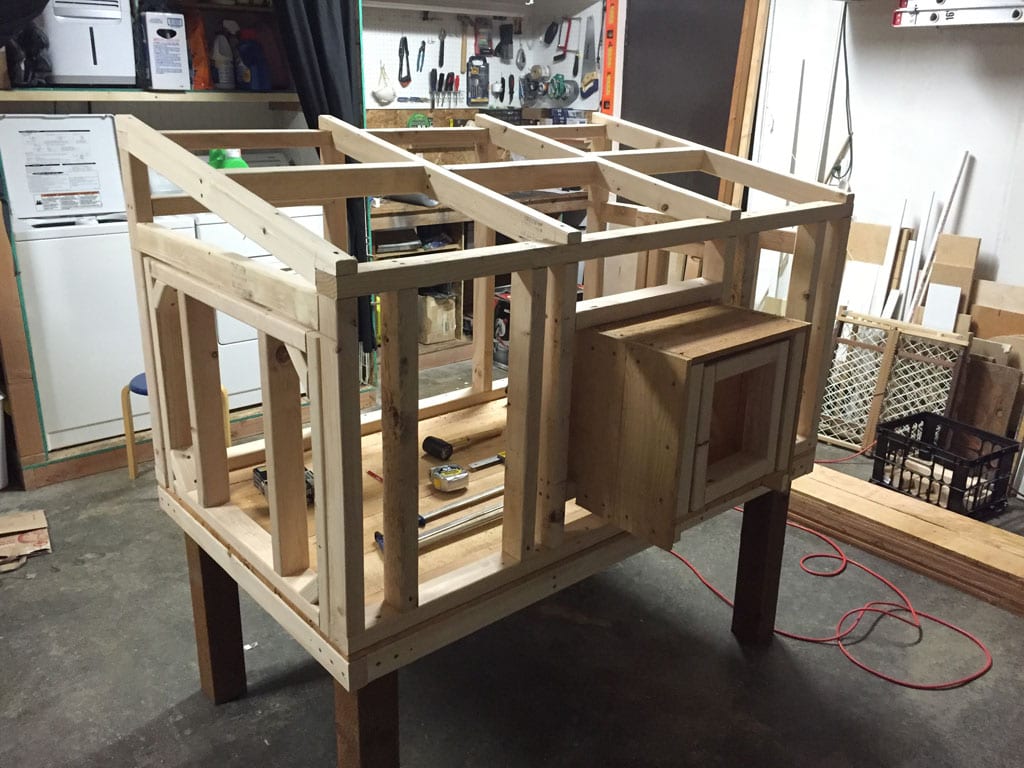
In hindsight, I wish I’d made the doors out of 2x2s instead of 2×3 studs. They are WAY too beefy and I had issues getting the doors to open correctly later when I installed the hinges. Live and learn, I suppose. It works, and no outside animals will be getting into this thing, that’s for sure.
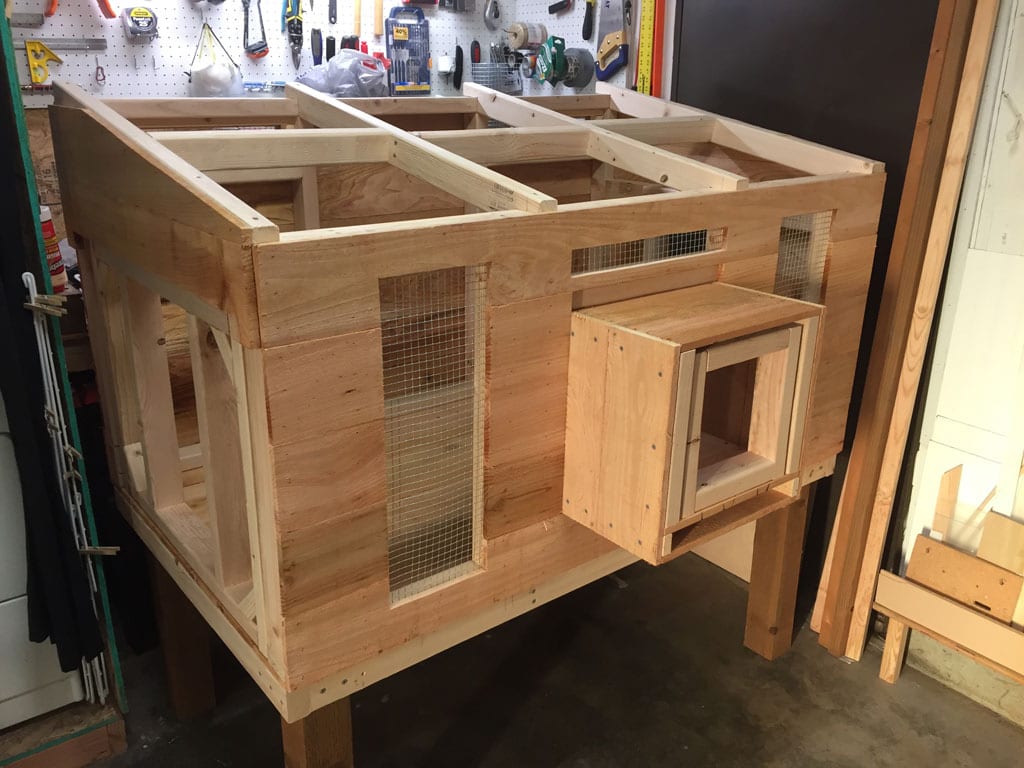
Once the framing was complete, I started attaching the cedar boards to the outside. I did make sure to use stainless steel nails in my nail gun, to prevent them from “seeping” rust after being exposed to the rain for a few months (it is the Pacific Northwest, after all).
Around this time I also attached some 1x2s inside the windows to attach the hardware cloth to. I used 1/2″ hardware cloth throughout this project, and all hardware cloth was attached with stainless steel staples fired from my air stapler. The little hand stapler simply did not drive the staples deep enough. Any staple that went in with my air stapler will NEVER be coming out (I couldn’t even get the couple of misfires out). No concerns about raccoons pulling out the staples holding the hardware cloth on!
Once the siding was on the walls and doors, and all the hardware cloth was installed over the windows and vents, it was time to paint. I had a nearly full gallon of light gray exterior paint from a project I never got to (painting the inside of the garage), so I took it to Lowe’s and had them darken it up considerably. I believe I put 3 coats of gray on everything that would be exposed to the elements.

I did the bottom boards in white, the other color exterior paint I had from the garage project I never got to.

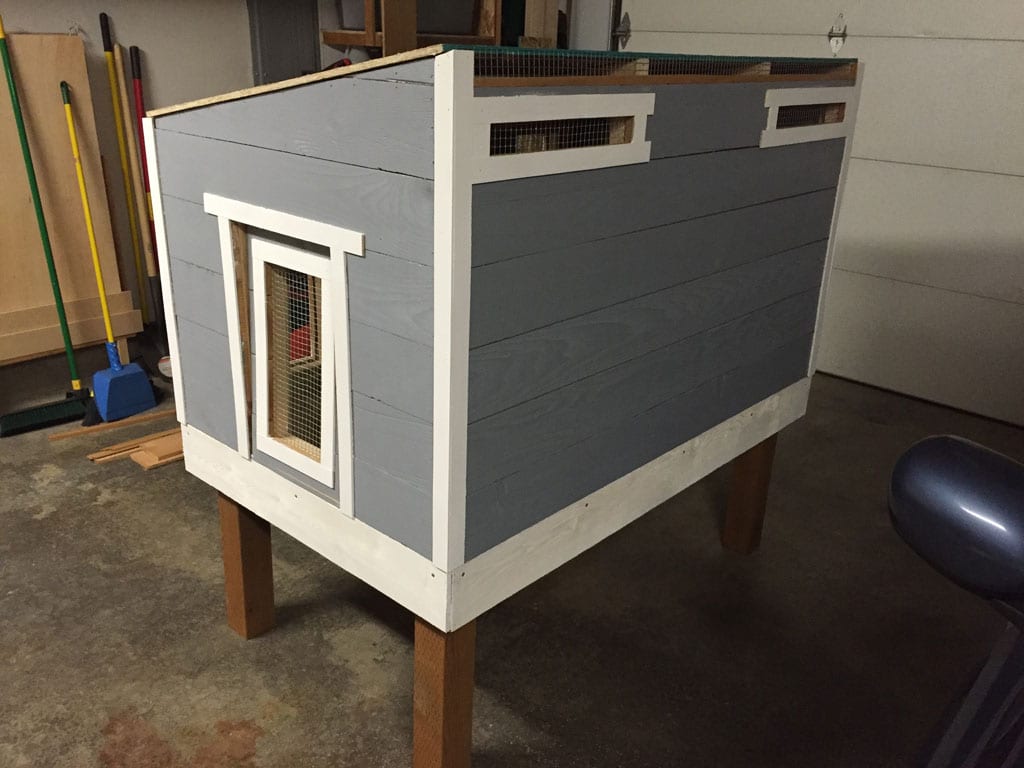
I wanted to make this thing look nice (I would be looking at it every day), so I used strips of cedar lathe to trim out the windows and doors. These were then painted white.
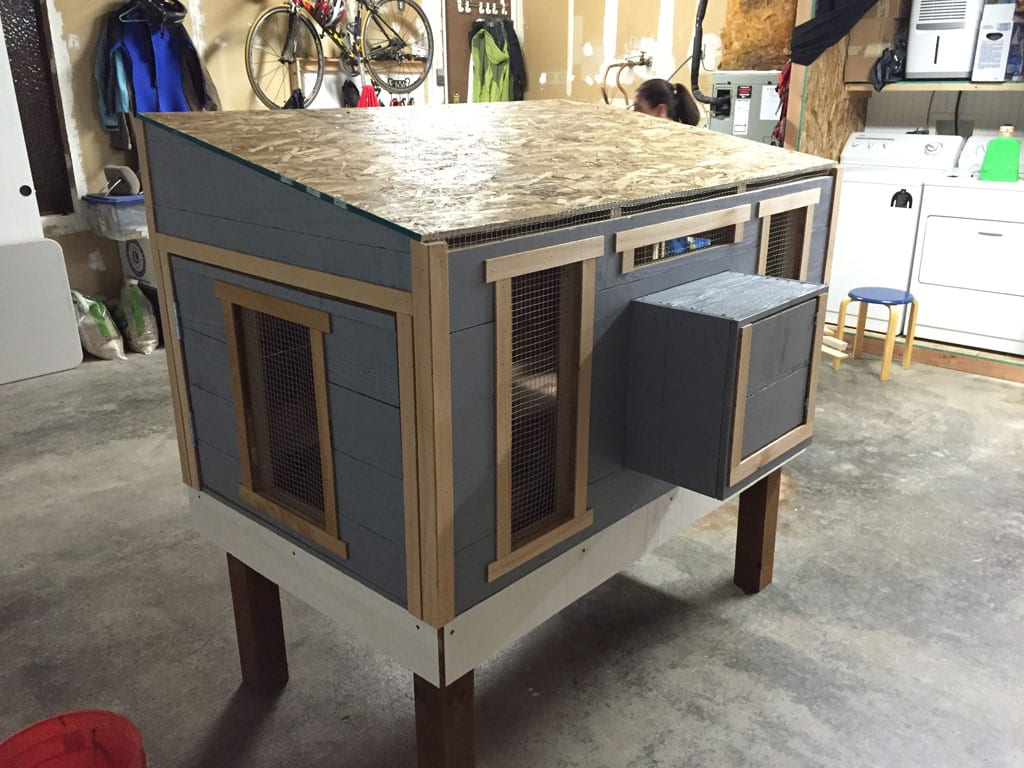
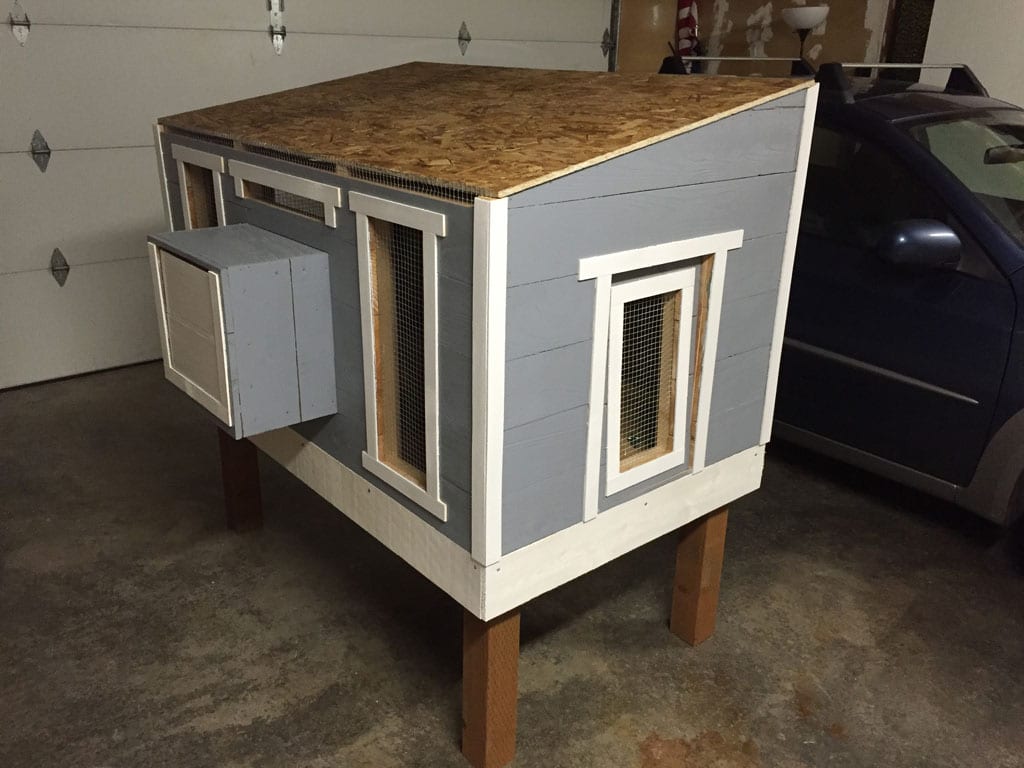
I put a piece of OSB on the top, so that I could attach the corrugated steel panel wherever I wanted (and so I wouldn’t have to worry about closing the caps between the frame and the corrugated steel, to keep rodents out of the coop). There is a gap between along the roof line, for ventilation. Ultimately, I may have put too much ventilation in this coop, but time will tell. Fortunately, we don’t get terribly cold winters or miserably hot summers here in Tacoma.
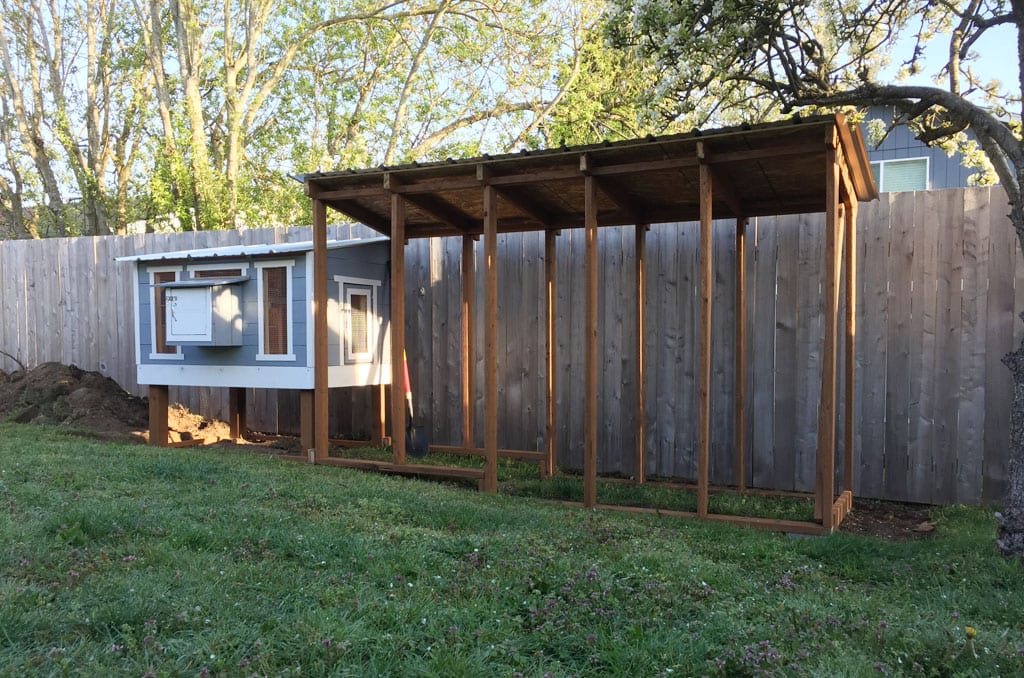
At this point, the coop was ready to move outside. I buried and leveled four half-cinderblocks for the 4×4 legs to sit on. I thought I had pictures of this, but I was wrong. Our friend Matt helped me lug the coop around back (it wasn’t as heavy as I feared it might be) and set it in place. There wasn’t much left to do but attach the door hardware (hinges, handles, locks/clasps) and put the roof on.
Building The Run
One of the reasons I decided to build a coop that was only three feet deep was because of the size of our yard. Our yard is relatively long, but not very deep. In addition, local code states that any chicken coop must be a minimum of 12′ from the nearest residential dwelling, which was easy but I needed to take into account that we may be building an addition on the back of this house someday. A coop that was 8’x8′ or 6’x10′ would have taken up a large chunk of the yard, something I wasn’t willing to give up. But, we still wanted to have a coop that could comfortably support up to 6 chickens (the city limit here, without needing permission from neighbors).
So to get the 60 square feet we were looking for, I needed to add a 10′ long run to the side of the chicken coop. And to make it accessible and (relatively) easy to clean, it needed to be tall enough for my wife to walk around in. The end result is a coop that is 10′ long, 3′ deep and approximately 6′ high in the front (and around 5’6″ in the rear). Plenty tall enough for my wife. Not so much for me.
Once I knew what size the run would be, I bought the necessary pressure-treated 2×4 lumber (I want this thing to last). I built the frame in the garage (again, I thought I had pictures, but I must have gotten so caught up in the build I forgot to take any!), then moved the walls outside. Again, I buried and leveled four more half-cinderblocks for the framing to sit on. I did make sure to excavate and level underneath the frames, so that no dirt was touching the wood. That should prevent it front rotting quickly.
I also had to put about a 6″ step-down in the frame, to better accommodate the slope of the yard. I was trying to preserve as much of the grass inside the coop as possible, at my wife’s request.
Once I got the walls attached to the coop, I built the roof supports the same way I did for the coop. I laid down some OSB and attached two more corrugated steel roof panels. All-in-all, I think the basic frame and roof for the run went together in a single (long) weekend.

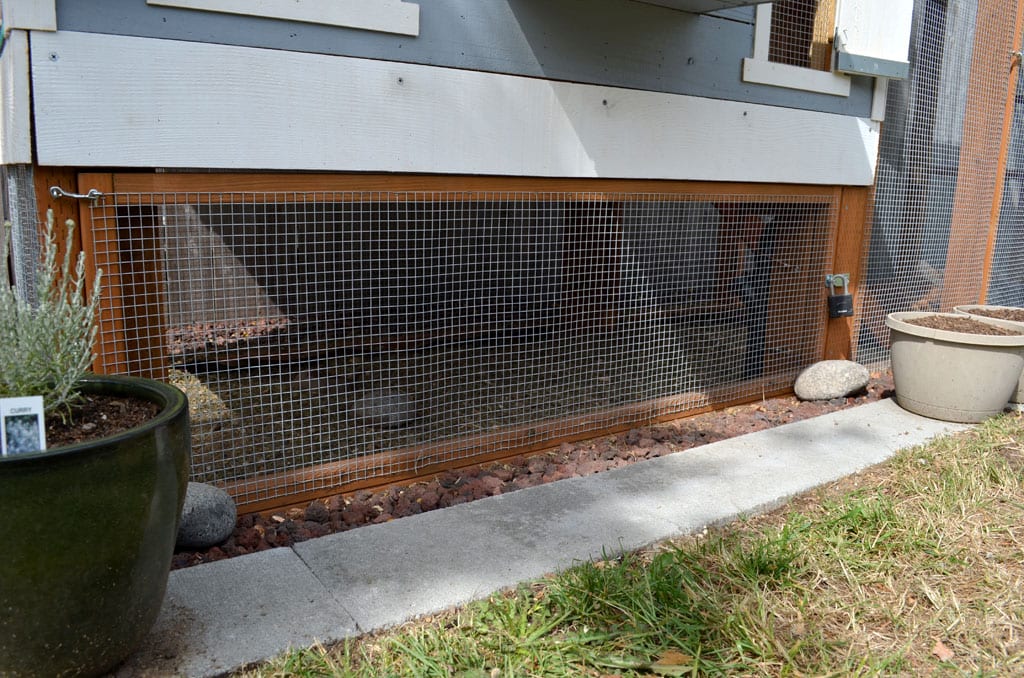
At this point, it was time to start installing the hardware cloth for the run and the area underneath the coop. I’d read in several books that one of the best methods for keeping animals from digging into the coop was to lay down a “skirt” of hardware cloth that extended at least 12″ from the base of the structure.
I didn’t want to have to fuss with mowing grass behind the coop, or running the trimmer right up against the sides of the coop, so I opted to do a decorative edge around the entire coop with concrete pavers and lava rock.
After digging a trench around the entire coop, I laid down some landscape fabric to (hopefully) prevent weeds from growing between the lawn and the coop. I attached the hardware cloth at the top of the run and attached it all the way to the bottom then out about 12″. On top of this I laid paver base for the concrete pavers (which I “stepped” to keep close to the slope of the yard), then filled in the area between the coop and the pavers with lava rock.
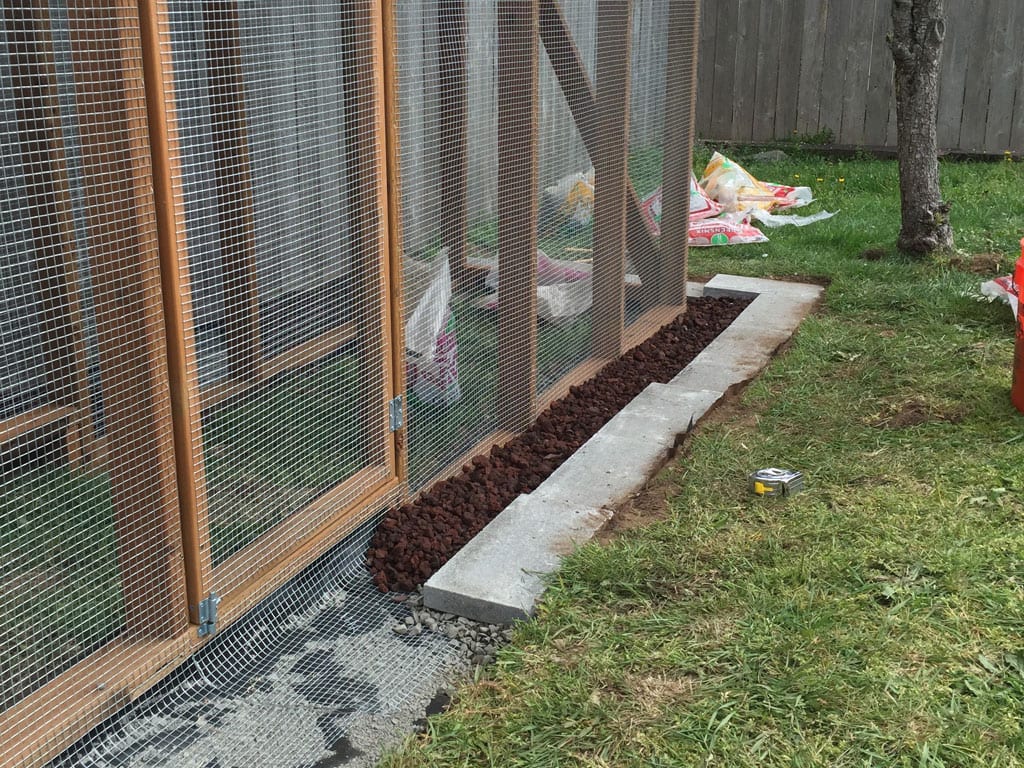
This took me the better part of the day, but I’m happy with the end result. Not only does it look nice, but it will make mowing the lawn just a little bit easier.

Finishing Touches
As much as I wanted to believe the end was in sight, there was still an awful lot left to do before I could call the coop “finished.”
I added shutters to all of the windows, so we can better block out the rain/wind when it does happen. These have already proven invaluable.
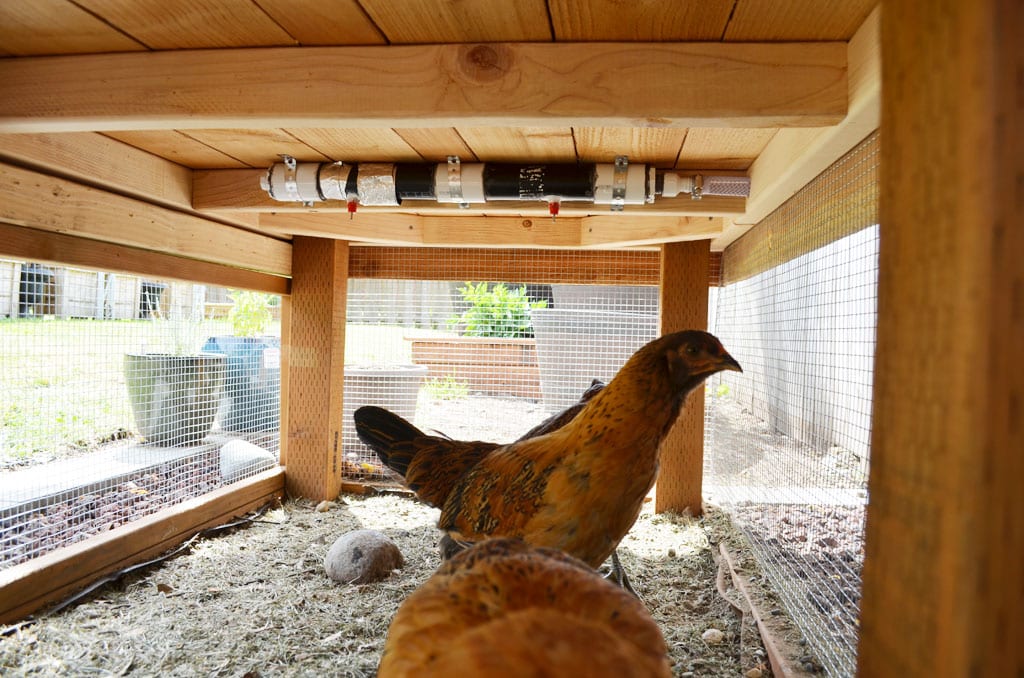
I also needed to set up a feeding solution that wouldn’t require daily maintenance. Michelle did some research and found several people have success with feed “tubes” made from PVC. I liked the idea, and had some PVC lying around that needed to be used.
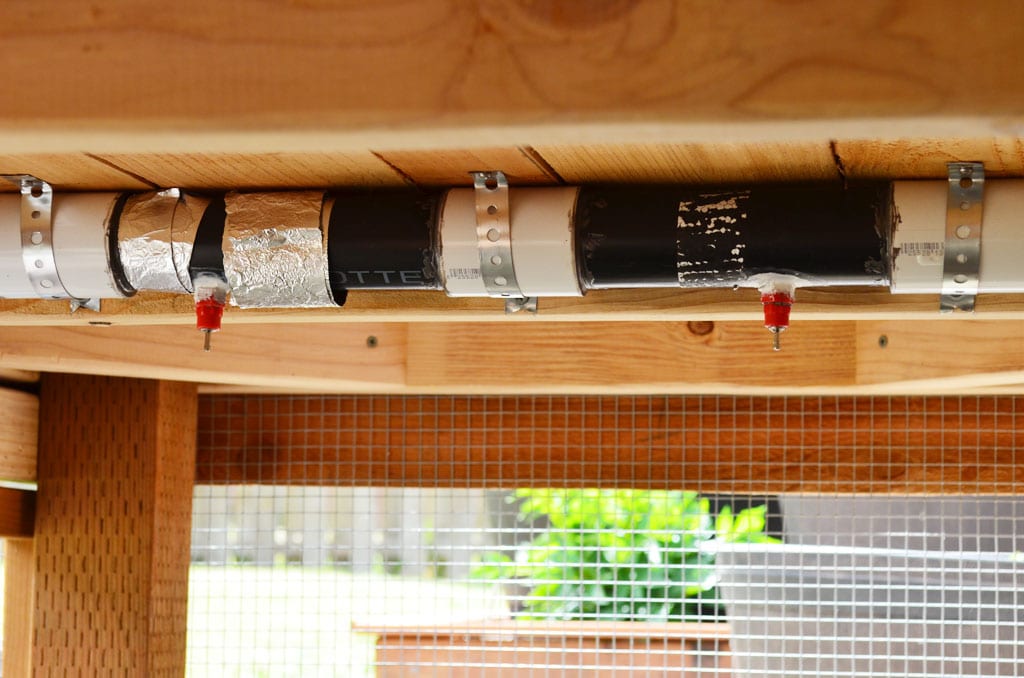
I spent about an hour and a half at the hardware store going through my different options. I landed on using my existing 1.5″ PVC, along with an assortment of fittings, to create a system that would give the birds two holes to feed from and allow us to refill the tubes from the outside of the coop (this was important, especially if we needed to have someone else come over and top off the feed while we are away).
At the bottom are wye fittings which allow the birds to easily reach the feed. There is a plug at the bottom of the wye fitting to prevent food from going all the way to the bottom.
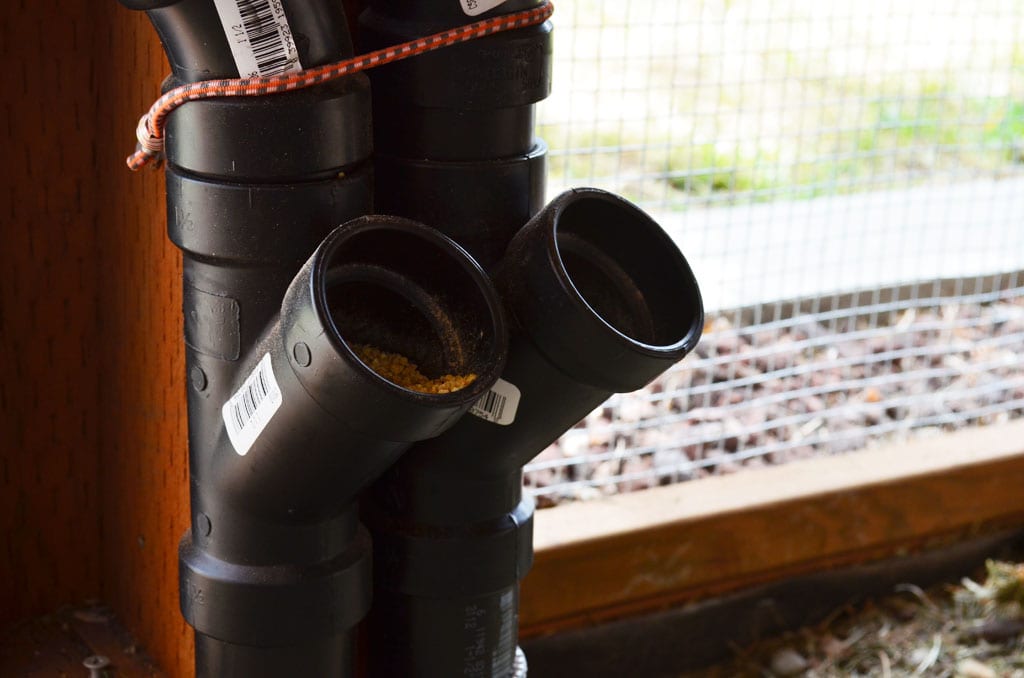
I used a series of 45-degree bends to get the top ends of the tubes outside of the coop, and caps keep the water, bugs, etc. out. I then drilled a small hole in each and ran a piece of fishing line with weights on the end into the tube. This allows me to easily check the level of feed without having to go into the coop and look in the bottom. When the weights reach the top of the run, they tubes need a refill! Looks like we’ll get about 4 days worth of food from a full fill-up.

Next up was the watering system. We’d been using a traditional watering tower/saucer, and the water does indeed get disgusting over the course of the day. I’d seen lots of people speak highly of the chicken nipples, and I wanted to give it a try.
Rather than order them online, we purchased them locally from Garden Sphere. It was more expensive, but it’s nice to support local when you can.
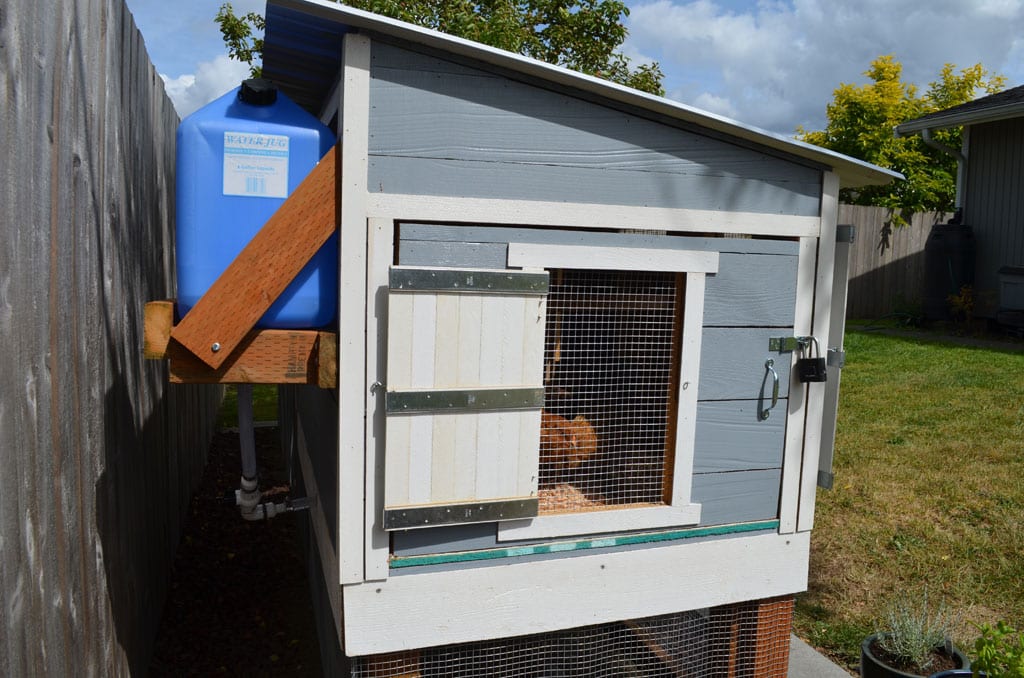
I purchased a 6-gallon water jug from Kmart, and built a platform off the back of the coop to hold it. I had to make sure this thing could support the full 6-gallons of water (nearly 50 pounds), so I tested it by hanging on it myself. Seeing as I made it out of scrap 2x4s and secured it to the frame of the coop with 3.5″ lag screws, it had no problem holding double/triple the necessary weight. We’ll probably never put 6 gallons in it, however, as water does tend to get a little stale after sitting for a while.
I purchased the necessary bits and bobs of PVC and hose to rig up the rest of the system. I used leftover 1.5″ PVC from the feeding tubes for the section where the chicken nipples would attach, and connected that to the water jug with a simple ball switch between them should I need to maintenance the system and not want to drain the water jug. I also put a 1/2″ plug in the opposite end of the system should I need to access that for any reason (clean out, extend the system, etc).
The first time I glued all the parts together, EVERYTHING leaked like crazy. It was pretty frustrating. So rather than troubleshoot my crappy plumbing skills, I opted to JB-WELD all the joints, and use silicon and plumbers tape on everything that might need to be removed/replaced later. Problem solved! No more leaks.
I did have some concerns about the amount of pressure being exerted on the chicken nipples and if that would cause them to leak. I gained some knowledge on calculating water pressure exerted at a particular point, and learned that even if I filled the 6-gallon water jug to the top, I shouldn’t ever be exerting more than 1 PSI of pressure on the nipples. During testing I did max out the system and had no leaks.
The section with the chicken nipples is attached underneath the coop so that the nipples are approximately 20″ off the ground. It took nearly an entire day to teach the chickens where to get the water, but once they figured it out they seemed more than happy to use it.
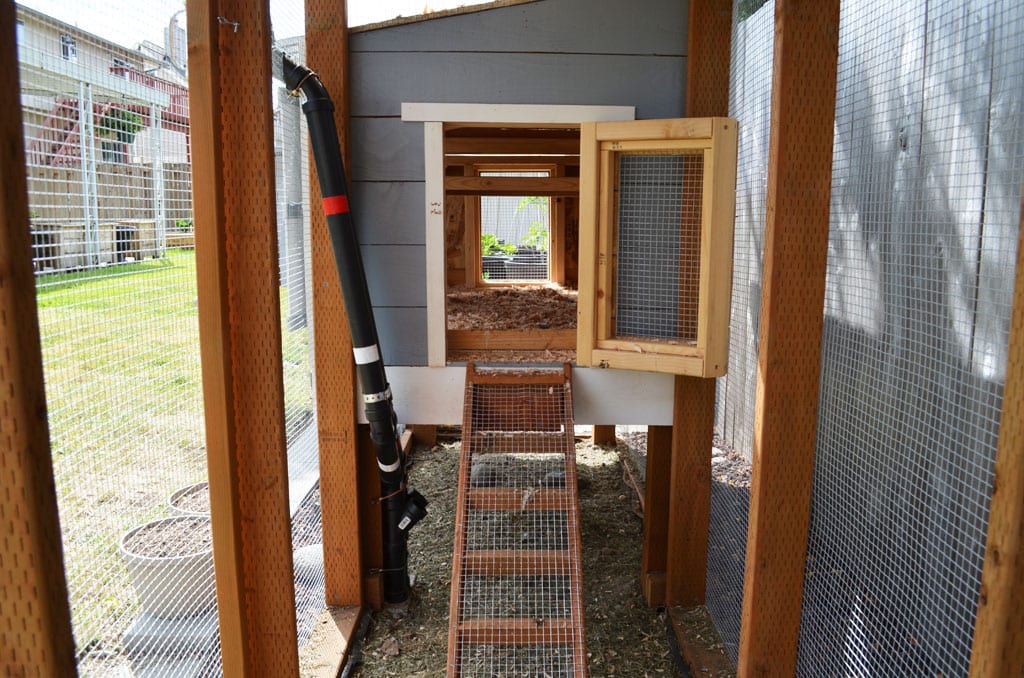
A few other little things here and there needed to be done. I restricted access to the nesting box (for now), and put some fake eggs in there (I read somewhere that you should do that).

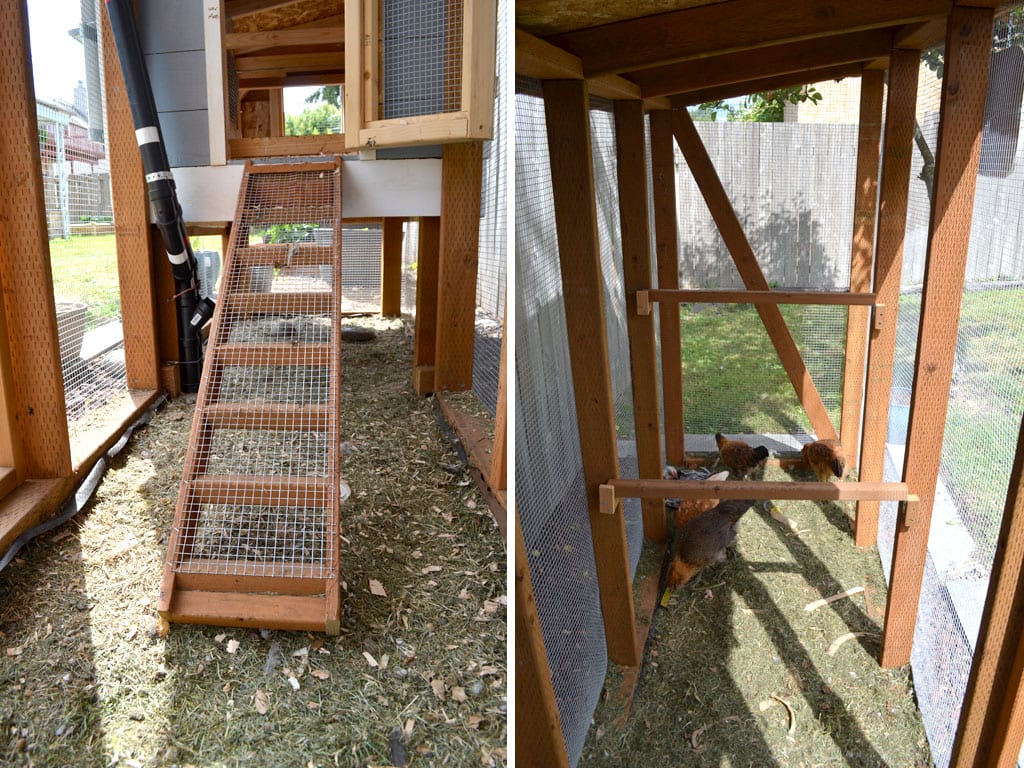
Unfortunately, our Light Brahma has a leg issue. Michelle has done a lot of research and investigation into the issue, but it seems to be tendon/joint related. As a result, she is unable to jump up onto the roosting bars. So I added a couple of platforms to hopefully help her get up there, as she has been VERY upset in the evenings when the other four leave her alone on the coop floor.
I had no idea if the system was going to work, but when I checked on them tonight before closing the coop up, all 5 hens were on the roosting bar together! I don’t know how she got up there, but it’s the first time I’ve seen her up there on her own, so she’s figured something out.

My original ramp into the coop was also problematic for our little crippled Light Brahma. So I built a beefier ramp that, after a few days and some encouragement, she’s starting using on her own. It’s not graceful, but it does allow her to get up into the coop without help from us.
I did also end up nailing scrap OSB onto the interior walls to cover the gaps between the cedar boards. I was concerned about it being too drafty and exposed, especially in colder weather. This may have been completely unnecessary, but it was a pretty easy thing to do that didn’t cost any extra.
On the opposite end of the run, I put in two more roosting bars for the hens to enjoy. And to make cleaning easier, they are hinged so they can swing up and out of the way. As you might have guessed, the Light Brahma isn’t capable of getting up on these. It’s probably for the best though, as she might (further) hurt herself trying to get down.
The front panel underneath the coop is completely removable, to make cleaning under there slightly easier. It’s also how I’m able to access the chicken nipples for install and maintenance (it’s neither comfortable nor ideal, but working in a 2′ tall area under a coop is never going to be a positive experience).
And then last, but not least, I made a sign for the coop, as a gift to Michelle (as if my building the coop wasn’t enough of a gift!). It’s kind of the pièce de résistance of the whole coop. I left it for last because, to me, it symbolizes the end of my obligation to the project. At this point, Michelle should be able to comfortably take care of her chickens, and we should all be able to thoroughly enjoy them.
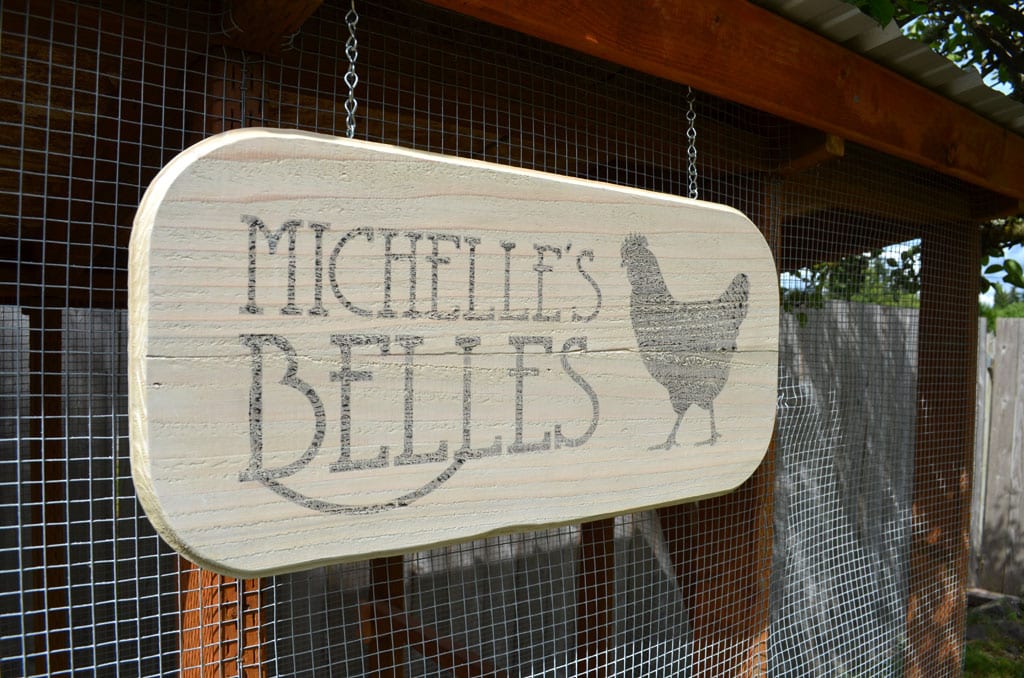
The sign is made from two scrap pieces of cedar board which I glued together then stained. I printed the artwork onto a piece of wax paper then transferred that to the wood. I used my router to make a slightly more decorative edge on it, then covered the entire thing in three coats of spar urethane. It should have a long lifespan, and any weathering that does occur will only add to its charm.
The end result is something I’m almost entirely proud of. Of course, as with any project, there are little details that bug me, but in the grand scheme of things it is a beautiful coop for our little backyard.
For those wondering, I haven’t done the exact calculations on the total cost of the coop. I believe, for everything you see, the cost came in between $800-$900. That includes all of the materials for the coop AND the landscaping (it was nearly $200 for the landscaping – I had no idea I would end up needing 1/3 cubic card of lava rock!). But had we purchased a 60 square foot coop, we would have paid A LOT more than that (two to three times, I suspect).
In terms of time, I probably have somewhere in the neighborhood of 100 hours into the project, done almost exclusively by myself. It’s a big accomplishment for me, and the biggest, most time-consuming, time-spanning project I’ve tackled to date.
So here’s to urban chickens and fresh eggs!
Looks great Derek!!!
Wow, Derek! You did a great job! Detailed planning and fine workmanship. I love that you accommodated your little crippled chicken, and the Michelle’s Belles sign is perfect. Must be so pleasant to look out into your yard and see that coop. Well done!
I am so impressed with your study of need for these now domesticated wildlife. You have considered their every need including the gimpy one. Keep me in mind in my retirement. I would love a screened in porch!
Wow, Derek! I loved reading about all of it. So nice that you made accommodations for your special needs chick. They are so lucky they went to you and Michelle. Enjoy the fresh eggs!
Incredible work, Derek! We’ve considered raising chickens and I really appreciate the amount of detail you put into documenting the build. Thank you!
Wow! Cool! Write a book about something, I would read it! BTW, my end was very heavy! Your just incredibly strong! Love all the pics and narrative, and never would of guessed the word ‘nipple’ would be used twice when I started! Can’t wait to try one of the future eggs! Please! And also love the sign and would like to learn about the wax paper transfer? Great job Derek, thank you for sharing . 🙂