I had been (unnecessarily) stressing out about how to approach the design for the nursery without being completely unrealistic. The “function” side of me says “Get a crib, changing table and glider. Call it a day. The rest isn’t important in the grand scheme of things.” The “form” side of me just wants to go wild and design something totally awesome for our little one.
Michelle and I spent weeks looking at different cribs, rarely agreeing on anything. After much deliberation, we decided that spending $400 on a crib was silly and we should go look at the $80 cribs at Ikea. We did so, and hated them. What we did happen upon was a pricier crib at Ikea that we both liked: the Gonatt.
Of course, that crib was not in stock and had no foreseeable re-stock date. So the search continued until we picked up a used Pottery Barn Kendall crib at a good price. After we set it up in the room, we immediately decided it was too big, and sold it. We continued waiting for a status update on the Ikea Gonatt crib, which came a few weeks later. The stock prognosis was inconsistent for a few more weeks after that, until our local Ikea finally had the Gonatt crib in stock.
We drove to Ikea on a Thursday evening (about a 50 minute drive for us) to pick up the crib and a matching dresser which would be doubling as a changing table.
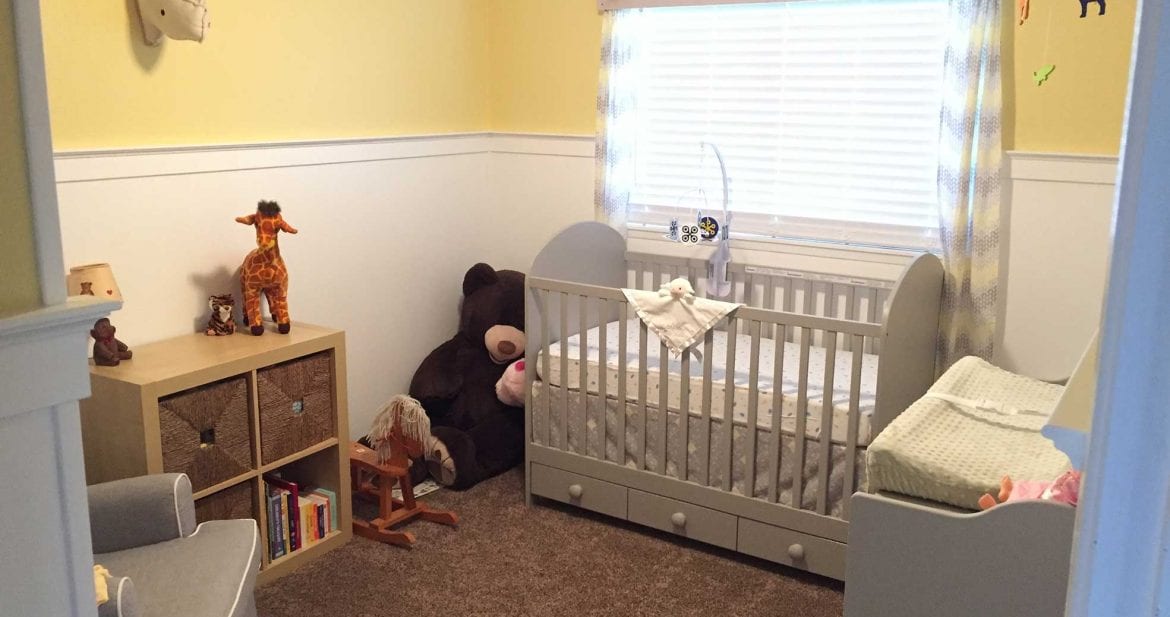
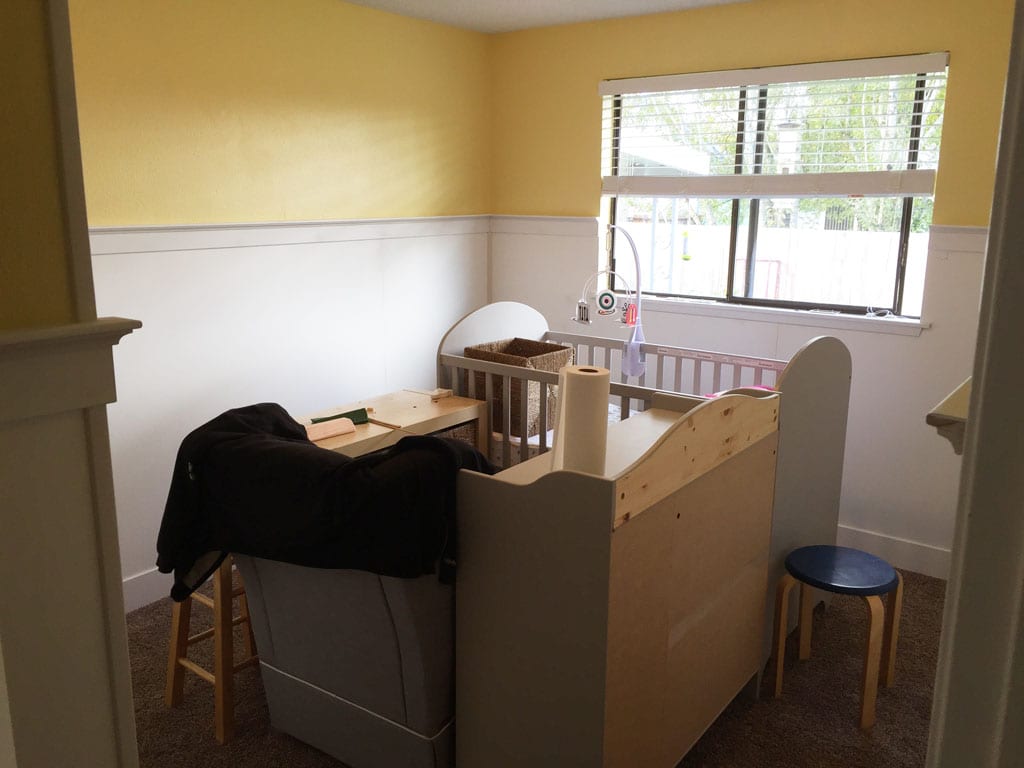
That weekend we built both the changing table and the dresser, then put them in the room. The wonderfully grey crib and dresser looked drag and boring against the grey walls and beige floor. Blah.
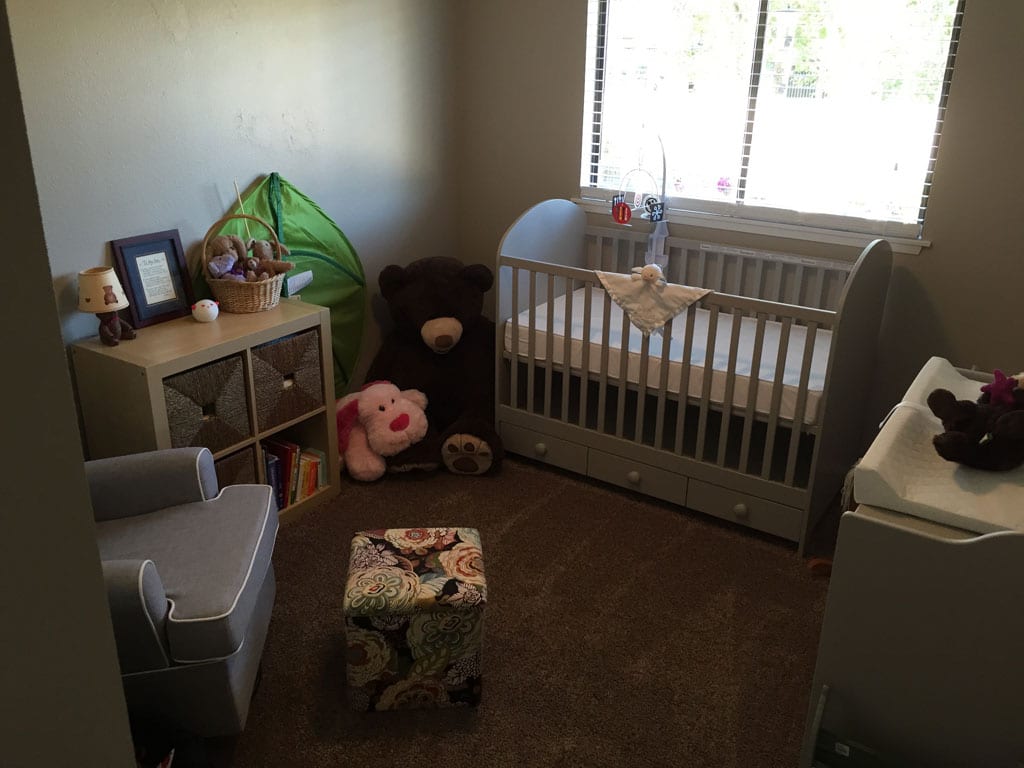
It was at that point we decided to overhaul the nursery and make it look amazing. And we only had a MAXIMUM of two months before the little one was expected to show up.
Several months prior I had seen some nurseries done in a board and batten style, and really liked it. Board and batten are pretty easy to do, only we have heavily textured walls and I knew that painting the bottom half white and nailing some boards to the wall was not going to cut it. I was either going to have to skim coat the walls with a new layer of plaster, or put up some paneling to hide the textured walls.
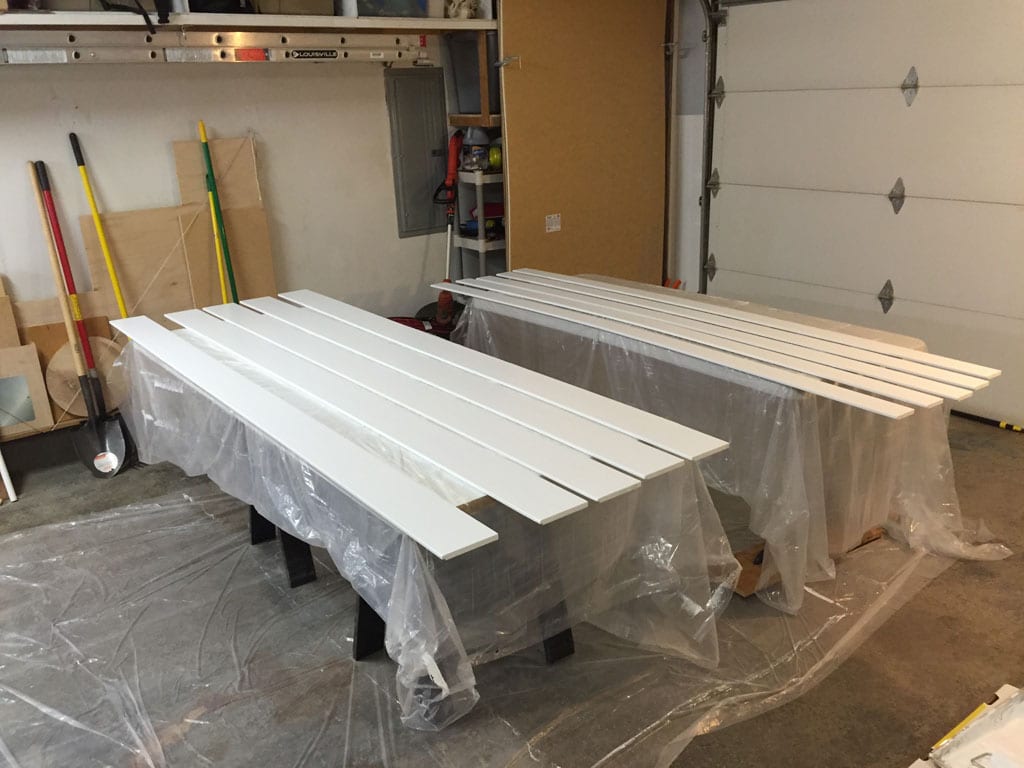
I settled on the latter and went with these 1/8″ thick hardboard panels from Home Depot for about $9 a piece. Our ceilings are about 7’9″ tall, and with a 5″ inch baseboard and a 3″ chair rail moulding, these 48″ panels would give me a total height of 56″. You don’t want to split a room horizontally with a chair rail, and 56″ was almost 2/3 the height of the room (a little less) and wouldn’t require any additional cutting of the panels. I bought enough to go around the entire room, laid them out on the garage floor and painted them Ultra White (because I had it lying around from a previous project).

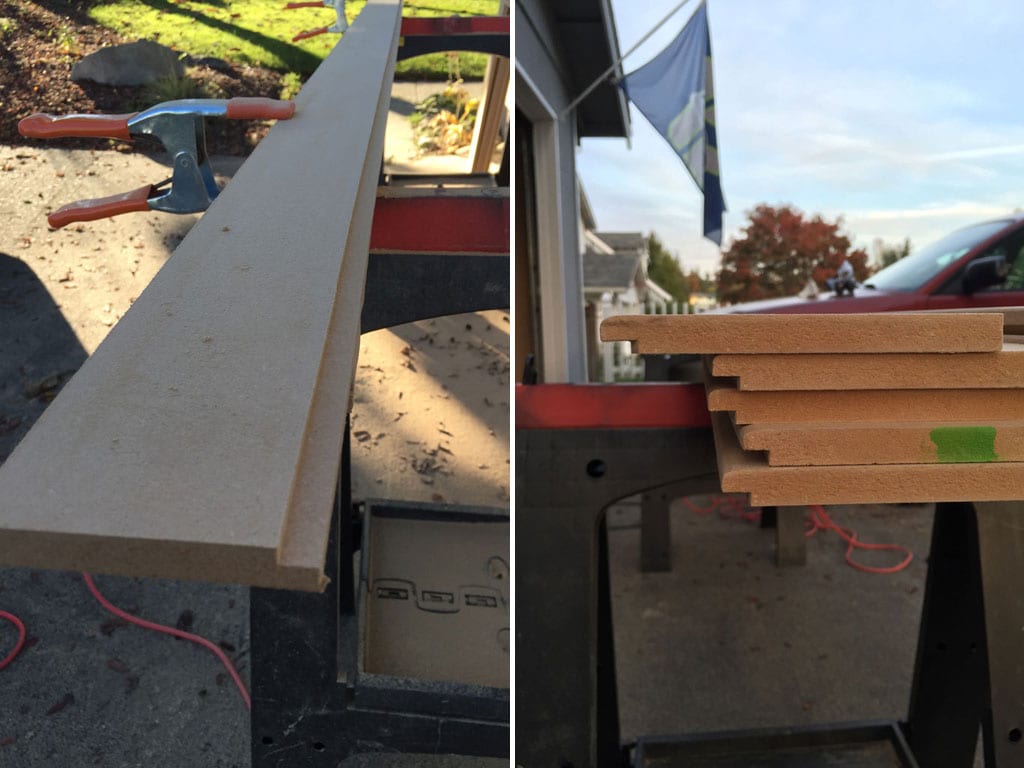
Next to tackle was the moulding. I could have purchased baseboard and chair rail moulding for a fortune. But I didn’t want anything ornate, and since I’ve always loved the Craftsman style (even though we don’t have a Craftsman style house), I opted to make my own simple baseboard and chair rail from MDF. I did my calculations and determined that from a single 4’x8′ sheet of 1/2″ MDF I could get enough 5″ baseboard and 3″ chair rail to do the entire room. It ended up being something like 800 some-odd inches of moulding for $25. That’s something like $0.37/foot.
I also decided it would be easier to install the hardboard paneling if I cut a notch in the back of the baseboard and chair rail for the panel to slide into, effectively eliminating the need to nail the top and bottom of the panels to the wall (the moulding would simply hold it in place). This idea saved us a TON of time when installing all of this stuff. So I used my router and a 1/2″ rabbet bit to cut out the notch in the boards. Glad I did this outside as the amount of sawdust it created was apocalyptic. After I did that, I used my router again and rounded over the front edge of each MDF board with a simple 1/8″ roundover bit.
I was aware of the off-gassing concerns with MDF, as well as the negative effects if the stuff ever gets wet, so I opted to put two coats of Kilz Primer on the MDF before painting them with the same Ultra White I had used on the hardboard panels.
Once the new moulding and panels were painted, it was time to start installing. I ripped out the old, dinky 2″ baseboards (I hate these, and the are EVERYWHERE in our house – baseboards, door moulding, ugh). Measuring, cutting and installing the new baseboards was quick and easy work, and they immediately made a big impact. In these photos, you can see how heavily textured our walls are.
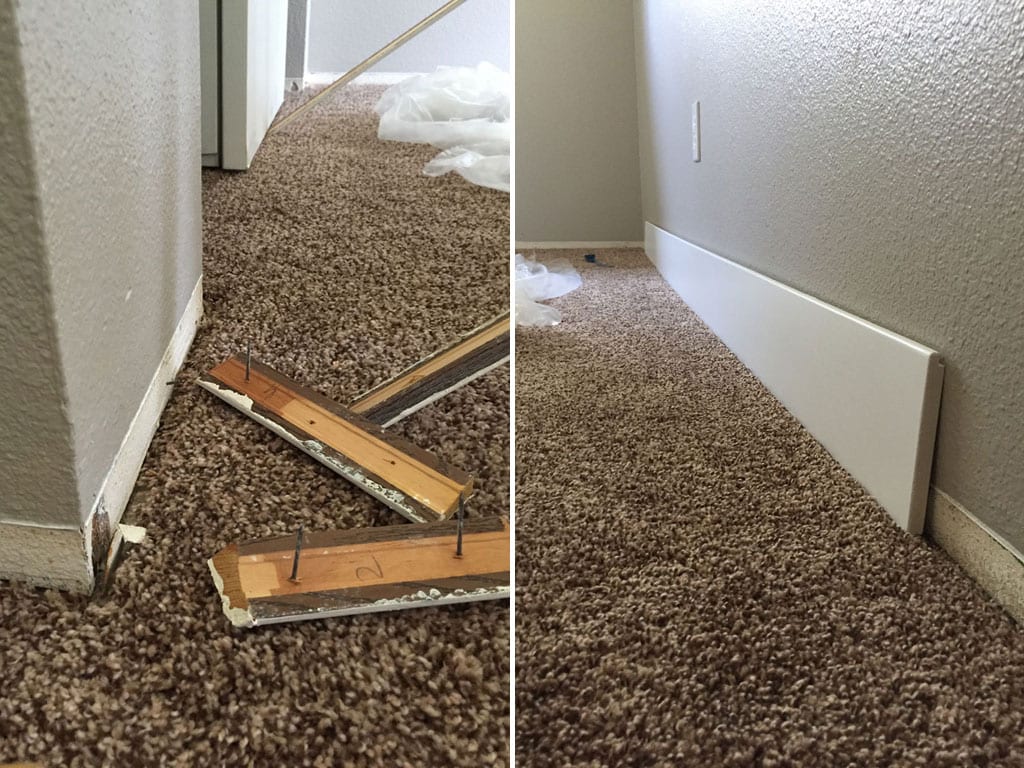
By the end of the weekend, I’d gotten all of the baseboards and wall panels installed (most of the wall panels were easy, minus the one’s that had to go around the window), and had started on the chair rail.
We had decided to go with a yellow color for the room, as we didn’t know whether we were having a boy or girl. Picking the “right” yellow was a real challenge. I didn’t really care too much, but Michelle was afraid of picking the “wrong” yellow. I don’t honestly remember how we landed on the color that we did, but it’s a beautiful yellow that looks great against the white paneling and moulding.

At this point, we were just about in the home stretch. Finishing the chair rail would be easy, then I had to cap it off with something, caulk all seams and put the final coat of white on the paneling.
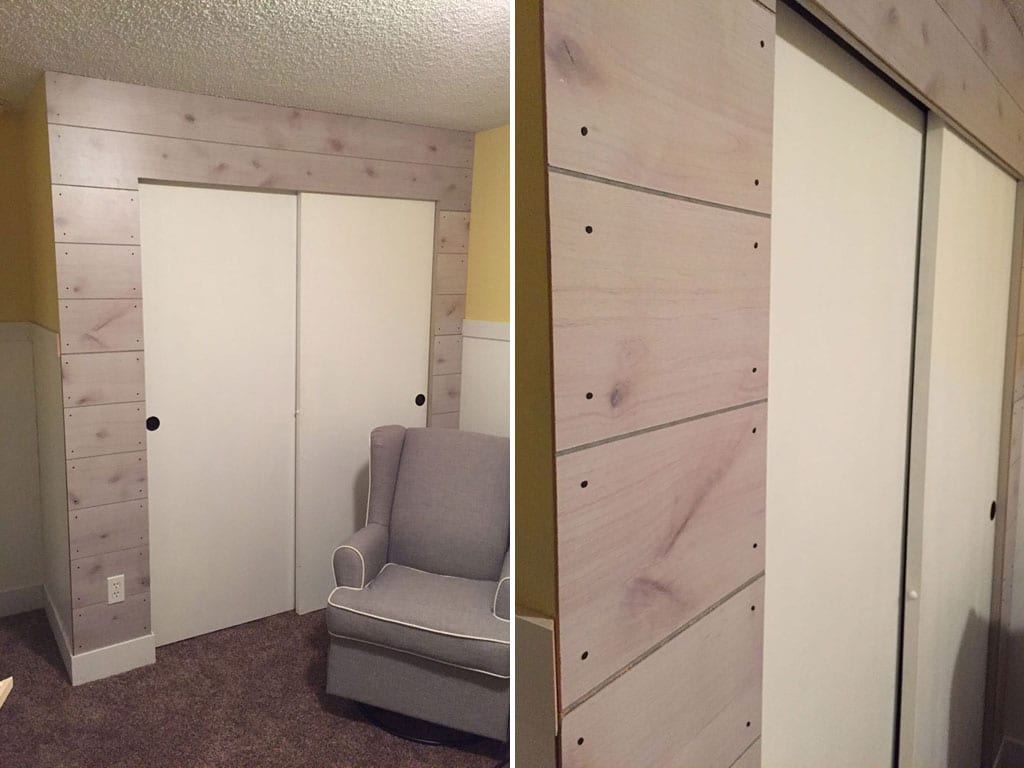
While we were at Home Depot several weeks prior looking at the hardboard panels, we saw a faux-wood panel (I know, I know) that actually matched the grey furniture wonderfully. We picked up a sheet of it (at about $18) to see if we could use it for accents in the room somehow. I ended up using it to cover the entire wall surrounding the closet door. (since there wasn’t that much wall there anyways). Knowing it may be the least-permanent part of the roof (it may not work with ALL decorating ideas) I installed it using carpet tacks, which add a rustic element to look and help with the realism. In the end, I absolutely LOVE how it came out. It’s such a fun wall and looks great against the white of the closet doors.
I don’t have a ton of pictures from here on out, as things were getting kinda hectic with the baby getting ready to show up in less than a month.
To finish off the chair rail, I picked up some 1/2″x3″ boards, and used my router to round over the front edges to make them “softer” looking and less dangerous. Installed and painted, then added a piece of cheap cove moulding to go underneath. We added corner moulding to the corners, then caulked all gaps and seams.
Michelle made window curtains from fabric she purchased, along with a crib skirt and a lumbar pillow for the glider.
And about that glider, which you’ve been seeing and I’ve said nothing about it. We wanted a more modern, club-style glider for the nursery, but didn’t want to spend $500. Also, our nursery is small so we needed to find the smallest glider we could. We ended up landing on this Eddie Bauer rocker/glider from Target, for $299. We loved the size, but man was it uncomfortable. So Michelle took the seat cushion to a local upholstery shop and re-did the foam inside (removing the springs) making it very comfortable. A $70 investment that was well-worth it.
Michelle (who at this point was either 35 or 36 weeks pregnant) put the final coat of white paint on the baseboard and panels while I was out one evening drinking beer with our pastor (a once-a-month thing I don’t like to miss!). She didn’t have to, but insisted. So when I got home 4 hours later (hey, 90 minutes of that alone is drive time), she was just finishing up the final coat, and covered in paint from head to do (I think she went swimming in it).
We hadn’t quite decided how to hang Michelle’s curtains. She had originally wanted to do a valence, but didn’t have enough fabric (our local store didn’t have much). She suggested we build a cornice and skin it with some of the leftover faux-wood from the closet wall project. I thought it sounded like a great idea and jumped right in. It was built from leftover particleboard (from another project), and I again used carpet tacks (and glue, this time) to attach the wood paneling. It adds a beautiful touch over the crib.
All that was left to do was hang the decorations and wait for the little one to arrive, which he did about a week after we finished. Just in time!

Such a big improvement over what we started with!
1
Leave a Reply