
The drawers in the guest bathroom were filled with medications, ointments, and sorts of other stuff that 1) our guests didn’t need access to, and 2) kids don’t need easy access to. To alleviate that problem I decided we’d get a medicine cabinet for our bathroom. Thing is, most budget-friendly medicine cabinets are MUCH deeper than what I wanted. I didn’t want something that stuck out much further than the toilet tank, which was somewhere in the neighborhood of 6″.
So I set out making my own, feeling much more competent and capable of completing the project after doing some research online and having worked on a few other little projects around the house.
I based my design/style off the Jelly Cabinet on Ana White’s site, but sized it to my needs. I used dimensional lumber (1×3’s and 1×4’s) for the framing and shelves, 1×2’s for the doors, and I used a piece of leftover 1/4″ plywood for the backing. I also added a piece of cove moulding to the top and bottom to dress it up a bit.
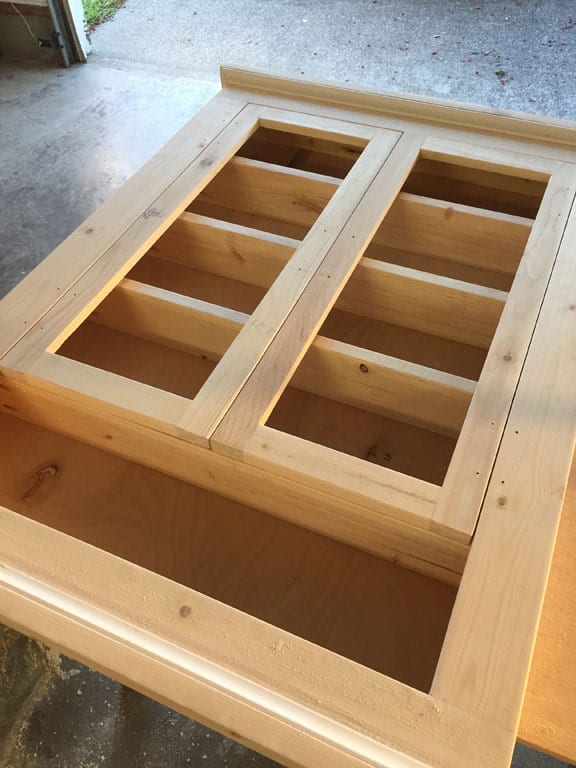
I used my Kreg Jig to assemble the doors, which (as you’ll see later) I was lazy about filling the pocket holes and they look terrible in the finished product. I also used my router and a rabbeting bit to cut a groove to install either some plexiglass or a mirror. I chose to use the same hinges and handles that I used on the corner cabinet in the dining room, because I like they way they look and they are inexpensive.

Once the assembly was done, all I had to do was fill the nail holes, sand, paint and seal. I used the same old ultra white eggshell I’d been using on everything else in the house (dining room, nursery, etc). and sealed it with a polycrylic. I’ve come to enjoy working with water-based paints, stains and sealers, only because I prefer the cleanup.
I almost forgot – before I painted the cabinet white I used a can of black spray paint to hit the edges of the bare wood. My intent here was to use some sandpaper and take off some of the white paint, revealing the black paint below and giving the piece more of an aged/dirty/distressed look.
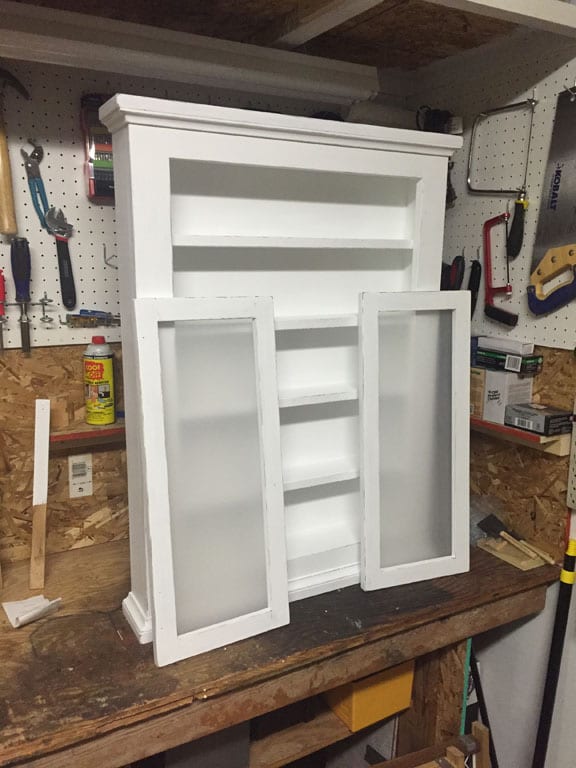
Michelle and I talked about putting mirrors in the doors, but I didn’t really feel like tracking down the glass and cutting it to size when I already had some plexiglass laying around. I didn’t want clear glass windows on the medicine cabinet, however, but couldn’t find any sure-fire ways to achieve the “frosted” look. So I did some small-scale testing on my own and determined that if I took my random orbital sander to the plexiglass, I would end up with an even, nice-looking frosted effect. I was pleasantly surprised at the end result.

Because this thing already had some weight to it, and we would be putting a lot of things into, I wanted to make sure it wouldn’t be falling off the wall. However, I only had one stud to work with, right in the center of the wall. Since I used a piece of 1/4″ plywood for the backing, I decided to use four 3″ wood screws, right in the middle of each shelf level, driven into the stud. I could probably hang on this cabinet (although I didn’t try!).
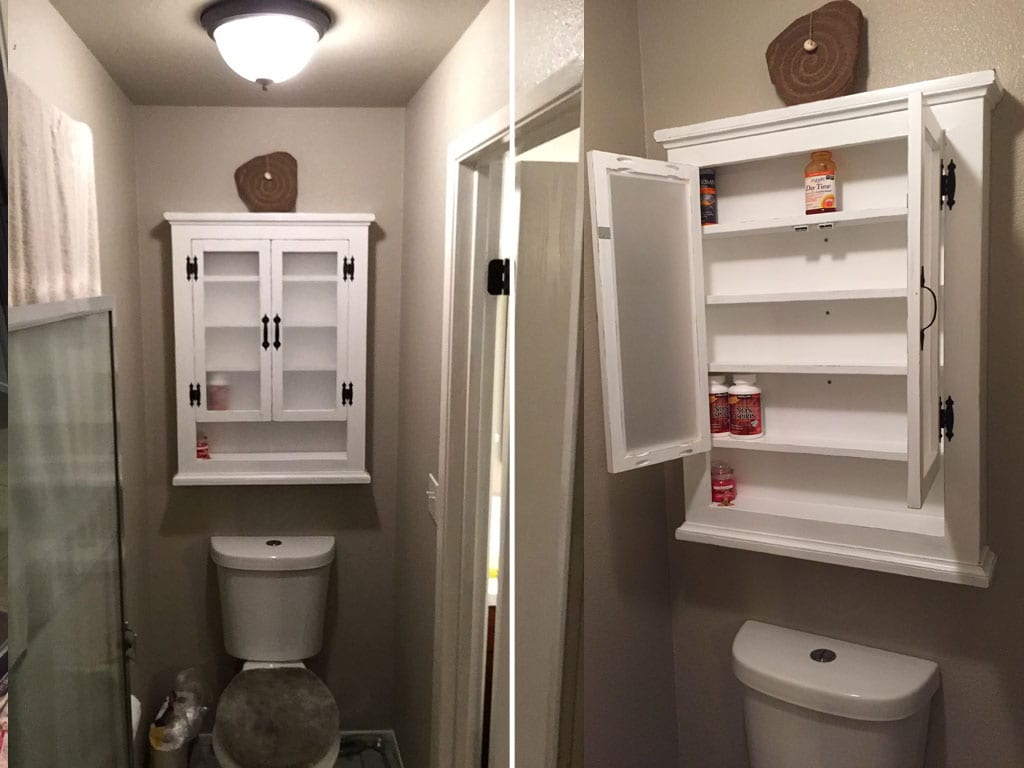
I’m really happy with the end result (minus the ugly backside of the doors) and it allowed us to free up two drawers in the guest bathroom for, you know, our guests to use.
1
Leave a Reply